10 steps for best results with Helium / IoT antenna setup
Helium network is a dynamic, fast growing technology we all can be part of.
To get the best possible performance of your Helium hotspot, antenna setup is the single most critical step. While it can be overwhelming navigating over the many online articles describing different options for Helium antennas, this simplified article describes easily what you need to do in one single page.
To get the best possible performance of your Helium hotspot, antenna setup is the single most critical step. While it can be overwhelming navigating over the many online articles describing different options for Helium antennas, this simplified article describes easily what you need to do in one single page.
1 - Install antenna outdoors as high as possible

1
Case A - Poor
An indoor antenna can have a combined loss of as much as 30dB attenuation (1,000 times lower signal level). The main reason is the high isolation created by house walls, which is critical for LoRa frequencies, in addition to window crystal reflections
2
Case B - Better
Installing outdoors increase signal level greatly. However, if antenna has no line of sight to other receivers/transmitters, the signal will not be optimal in level, and due to bouncing with other buildings, distort packages and reduce chances of quality link
3
Case C - Best
Installing the antenna outdoors and free for line-of-sight connection, you are providing a significant gain for your Helium hotspot. This is the best possible setup
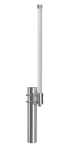
2 - Use the right antenna gain for your location

Different antenna gains to choose from
Understanding your location and how to deal with nearby and far away hotspot is critical for good Helium HNT return with optimal investment

1
Case A - 3dB indoors
Indoor antenna best results is 3dB gain. In this way the antenna will improve nearby links. A higher gain antenna will reduce link quality in this scenario so it is not recommended.
2
Case B - 3-5.8dBi outdoors
Outdoors antenna with reduced link distance due to obstructed line-of-sight, make sure to install a 3dBi - 5.8dBi antenna for best results, as combined nearby and medium distance links
3
Case C - 8dBi outdoors
Outdoors antenna with free line-of-sight can get best results with high gain 8dB antenna. Specially if you are in area with low density hotspot nearby, use a high gain antenna 8dBi and make sure to install really high using long mast over nearby building, houses, hills for best performance
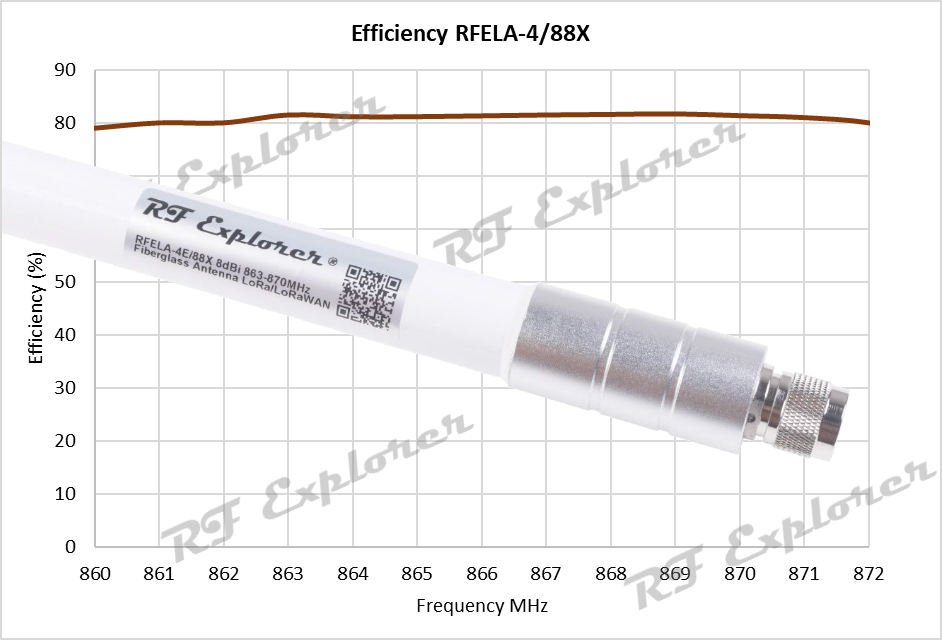
3 - Select a quality, high efficiency and robust outdoor antenna

Not only about antenna gain
After selecting the right gain, it is important to put your money on a good quality antenna. It is not only about gain: efficiency is an important factor. Low quality low efficiency antennas will degrade signal detection even if antenna gain is high. The reason behind this has to do how efficiently the antenna converts the radiated energy into usable signal: with low efficiency a significant part of the signal is lost and never gets into your hotspot, producing low witness count and small HNT revenue.
Low efficiency hurts
In many cases users compare equivalent setups with same antenna gain, e.g. 8dBi setups with very different results: one of the main reasons can be assigned to a low efficiency antenna when compared to high efficiency antenna.
Best in class
RF Explorer fiberglass antennas are best in class efficiency antennas, tested in certification laboratory
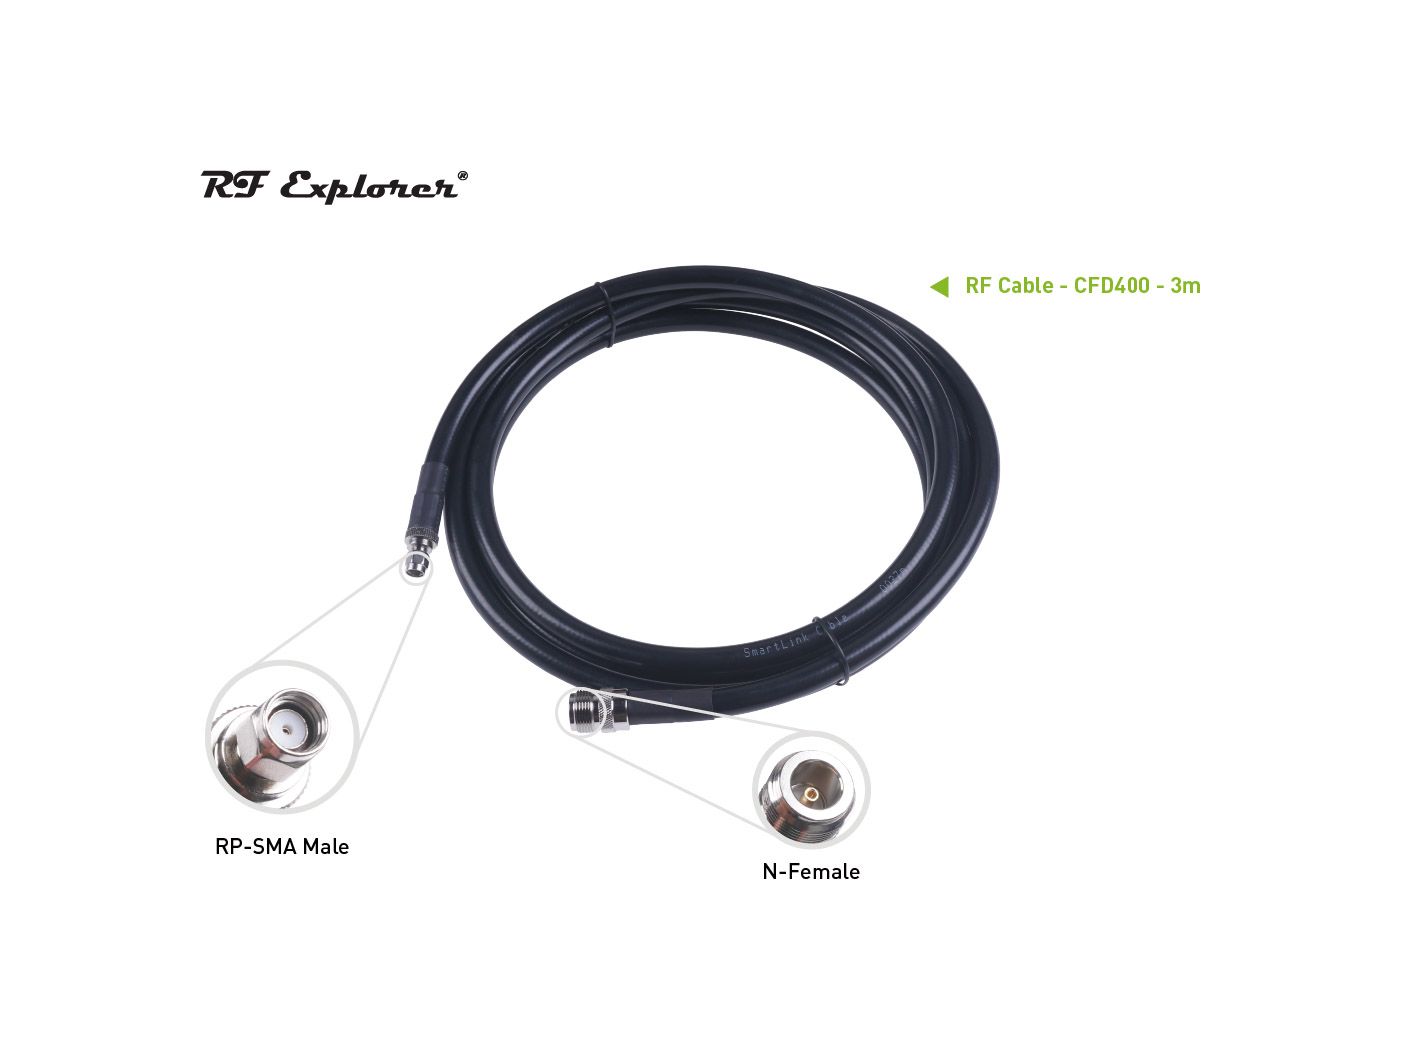
4 - Use quality, correct length cables to connect Helium hotspot to your antenna

Different cable lenghts and connectors available
Connecting the right cables in daisy chain helps to drive your antenna at any distance with low loss

1
Cables to help get your antenna outdoors
It is important to use as much cable as you need to get your antenna outdoors and high over other buildings. Quality cables introduce very low loss. If you consider a gain of 30dB by moving your antenna outside, reducing that gain by 1 or 2dB is a very small price to pay, you are still 28dB better than locating your antenna inside your house. With flat cable is very easy to get your antenna outdoors with no impact in your walls.
2
Use correct cable length
Cable lengths of 5-8mts are perfectly ok, you should not normally need to go beyond this. Configure your hotspot physical location to be as close as possible to the point where the cable gets outdoors
3
Avoid low quality cables
Using low quality cables has significant higher impact in dB loss, a 5mt low quality cable can introduce 5dB higher loss than an equivalent quality cable
4
Must work long term
High quality cables are designed to operate outdoors under high and low temperature conditions and keep the same performance for years. Low quality cables introduce loss and signal distortion by simple flex and curves required to reach your antenna, and degrade quickly outdoors
5 - Monitor performance and adjust location if needed

Adapt to changes
Helium is a very dynamic network with regular changes, performance improvements and, yes, sometimes network glitches that may keep your hotspot from working at full potential. It is important you adapt your setup to dynamic changes as they come
Compare Helium performance nearby
Best approach is to consider a good setup get 100-200% of average hotspot income. If you are regularly below this, you need to update your setup with a better antenna, cable or antenna position
6 - Setup the antenna correctly
Assembling the antenna usually requires a mast and some good practices to get best results
Vertical Antenna assembly
The vertical polarization of all other Helium hotspots will only provide quality link if the antenna is vertical, correctly assembled with metallic holders to stay that way regardless external weather.

Far from metallic surfaces
Metallic surfaces, such as a air conditioner sets, metallic door or a gas container may produce significant signal reflections and impact antenna impedance. Place your antenna as far as possible from these objects.
Note in this setup a mast of several meters is required to get distance from metallic objects.
Note in this setup a mast of several meters is required to get distance from metallic objects.

Oblique Antenna assembly
This antenna will not perform correctly.
If required use additional mast hardware and antenna support to overcome obstacles and setup totally vertical polarization antenna.
If required use additional mast hardware and antenna support to overcome obstacles and setup totally vertical polarization antenna.

Incorrect antenna distance
In this extreme example of how not-to-do an assembly, multiple antennas are too close together, impacting performance drastically and potentially interfering and even overloading receivers and transmitters together
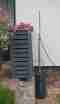
7 - Use a location with free open view in 360 degrees
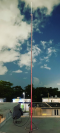
Increase antenna height assembly
Even if the antenna is placed in a high position above roof, it may have nearby buildings or obstacles preventing a clean 360 degrees coverage.
You may need to install a mast to place your antenna above these obstacles to get a clearer view
Avoid obstacles and walls
As much as using an outdoor antenna increases range and link quality, a poorly placed antenna will mostly reduce any chance to get an actual gain.
In this example the antenna is poorly located in a garden where house walls, trees and other obstacles will prevent any significant performance.
In this example the antenna is poorly located in a garden where house walls, trees and other obstacles will prevent any significant performance.
8 - Protect the Helium Hotspot with a Lightning Arrestor

Long antenna mast requires lightning protection
Storm weather may be dangerous to your setup with an outdoor antenna if not correctly protected. Use a Lightning arrestor so it works as a fuse for strong electric fields may be created in certain situations
Follow good assembly practices
Make sure to follow assembly instructions for best results, specifically use a good ground connection to divert excess electric field from storms into the house/building ground
9 - Detect interferences and signal blockers with RF Explorer
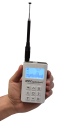
Detect interference
In certain areas a strong, interfering signal may be the reason the performance of your Helium hotspot is low. A competing signal in the same or close frequency can negatively impact in the sensitivy of the Helium hotspot and reduce the packages received or transmitted cleanly
Easy to use RF analyzer
Use a spectrum analyzer like RF Explorer to determine the activity in your frequency range and detect interferers. If the signal detected is too strong may actually indicate an offending, illegit transmitter you can locate with your RF Explorer and request to adjust to legal power levels
10 - Install the antenna far from electrical noise
Most devices like LEDs, large motors, DC/DC Solar pannels generate spurious signals in many frequencies including those used by LoRa. Even if the interference generated is within legal regulatory ranges, it may negatively impact your hotspot sensitivity.
A RF Explorer spectrum analyzer can help locate the source of electrical noise measuring devices one by one.
By either removing those devices or getting as far as possible from them, you reduce or effectively eliminate the negative impact on your hotspot and can increase the successful packages.
